Want to publish your own eBook without breaking the bank? Discover how open-source tools like GIMP, LibreOffice, and Calibre can turn you into a one-person publishing powerhouse.


Introduction
Self-publishing authors often wear many hats—writer, web designer, marketer, and cover artist. Fortunately, there are plenty of powerful tools available to make the process easier. Even better? Many of them are completely free!
To create an eBook, you’ll need at least three essential tools:
👉🏾 A graphics editor for book covers, marketing materials, and social media images. I’ll be using GIMP, which comes preinstalled with most Linux distributions.
👉🏾 A word processor to write and format your manuscript. My choice here is LibreOffice.
👉🏾 An eBook management tool to build and organize your eBooks. For this, I’ll be using Calibre.
Calibre is not only a fantastic eBook reader and library manager, but it also allows you to create and edit ePub files directly in Linux.
Preparing Your Manuscript
Calibre can automatically generate a table of contents (TOC) for your eBook, but first you’ll need to structure your manuscript correctly in LibreOffice Writer.
👉🏾 Open your manuscript in LibreOffice Writer and delete any existing table of contents.
👉🏾 Highlight each chapter title and apply the Heading 1 style from the paragraph style drop-down menu.
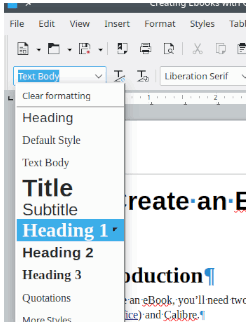
👉🏾 If you have sub-chapters that should appear in the TOC, set those titles to Heading 2.
👉🏾 When finished, save your document as an .odt file:
💥 Go to File > Save As
💥 In the File type / Filter field, select ODF Text Document (.odt)
💥 Enter your file name (e.g., manuscript-name.odt)
💥 Click Save
Creating an eBook Cover
The standard size for an eBook cover is 1410 × 2250 pixels.
GIMP (GNU Image Manipulation Program) is a free, open-source tool for editing photos, designing graphics, and much more. In many ways, it’s comparable to Adobe Photoshop—making it an excellent alternative if cost has kept you from using commercial software.
This guide won’t cover every feature of GIMP. Instead, we’ll focus on how you can use it to design a professional, eye-catching book cover.
If GIMP isn’t already installed on your system, you can download it for free here..
Selecting an Image
GIMP itself doesn’t provide images, so you’ll need to source one. You can either create your own, generate one with an AI tool (ex. Copilot), or choose from free image libraries. Popular options include:
👉🏾 Pixabay
👉🏾 Pexels
The key is to ensure the image is licensed for commercial use. Just as we wouldn’t want others to misuse our work, we must respect the rights of fellow creators. Fortunately, both Pixabay and Pexels clearly indicate that their images are free for commercial purposes.
Once you’ve found and downloaded your cover image, import it into GIMP.
💡 Tip: Create a dedicated folder—e.g., Cover_Images—to keep your files organized.
Fire-up GIMP
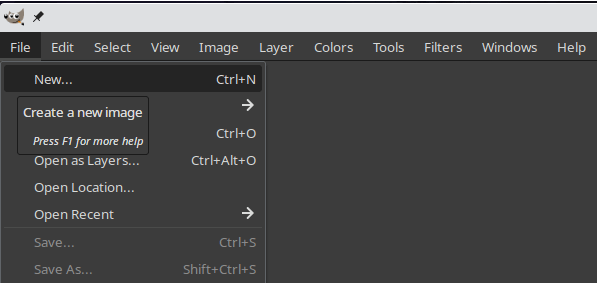
👉🏾 Open GIMP, go to the File menu, and select New.
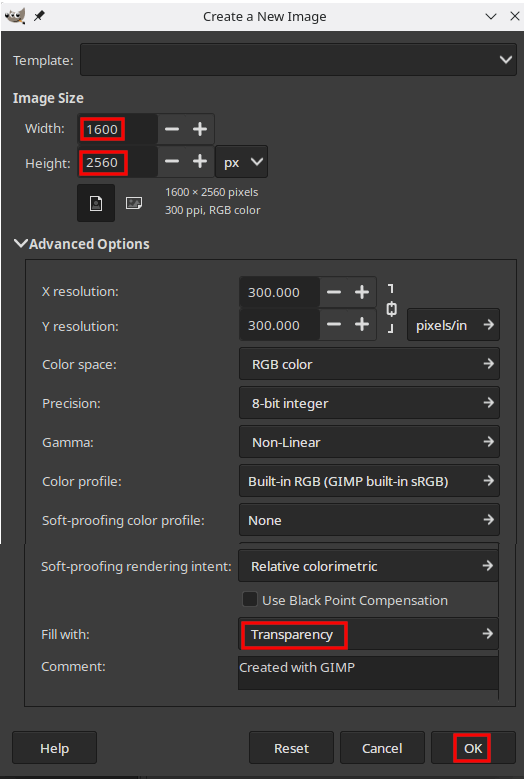
👉🏾 In the dialogue box “Create a New Image”, set your cover dimensions to 1600 × 2560 pixels (Amazon’s minimum requirement and compatible with most other retailers).
👉🏾 Expand the Advanced Options tab and adjust the background color, by selecting Transparency as the Fill With option.
👉🏾 Click the OK button to generate a blank template.
👉🏾 Import your downloaded or created cover image:
💥 Go to File > Open, locate your image, and click the Open button.
💥 The image will appear in its own tab. Select its tab to make the imported image the active image, then go to Edit > Copy to store the image in memory.

💥 Switch back to your blank template by clicking its tab and choose Edit > Paste.
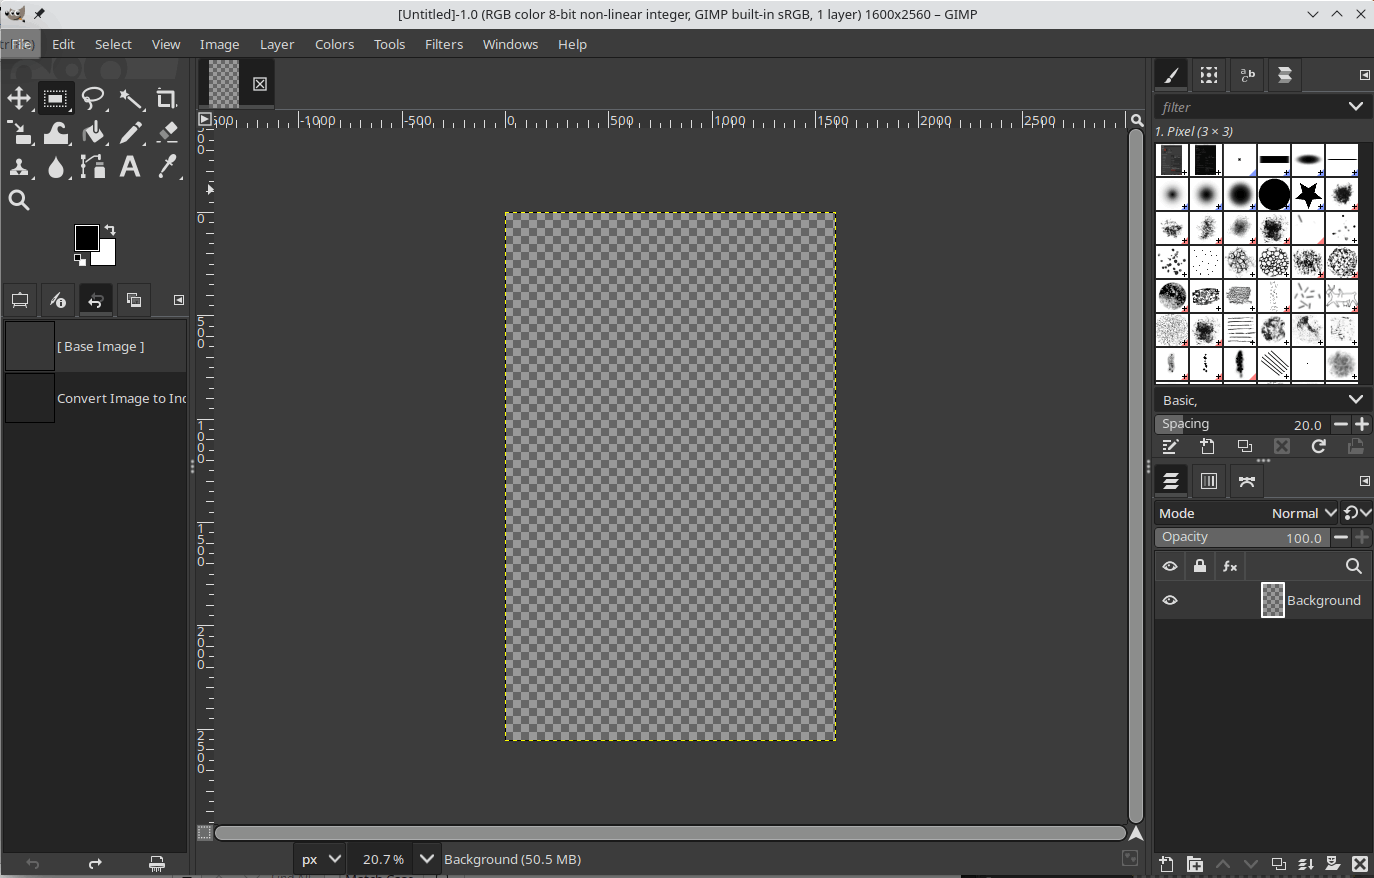
💥 Your imported image is now added as a new layer (visible in the Layers panel in the lower right corner of the Gimp project window) to the blank template.
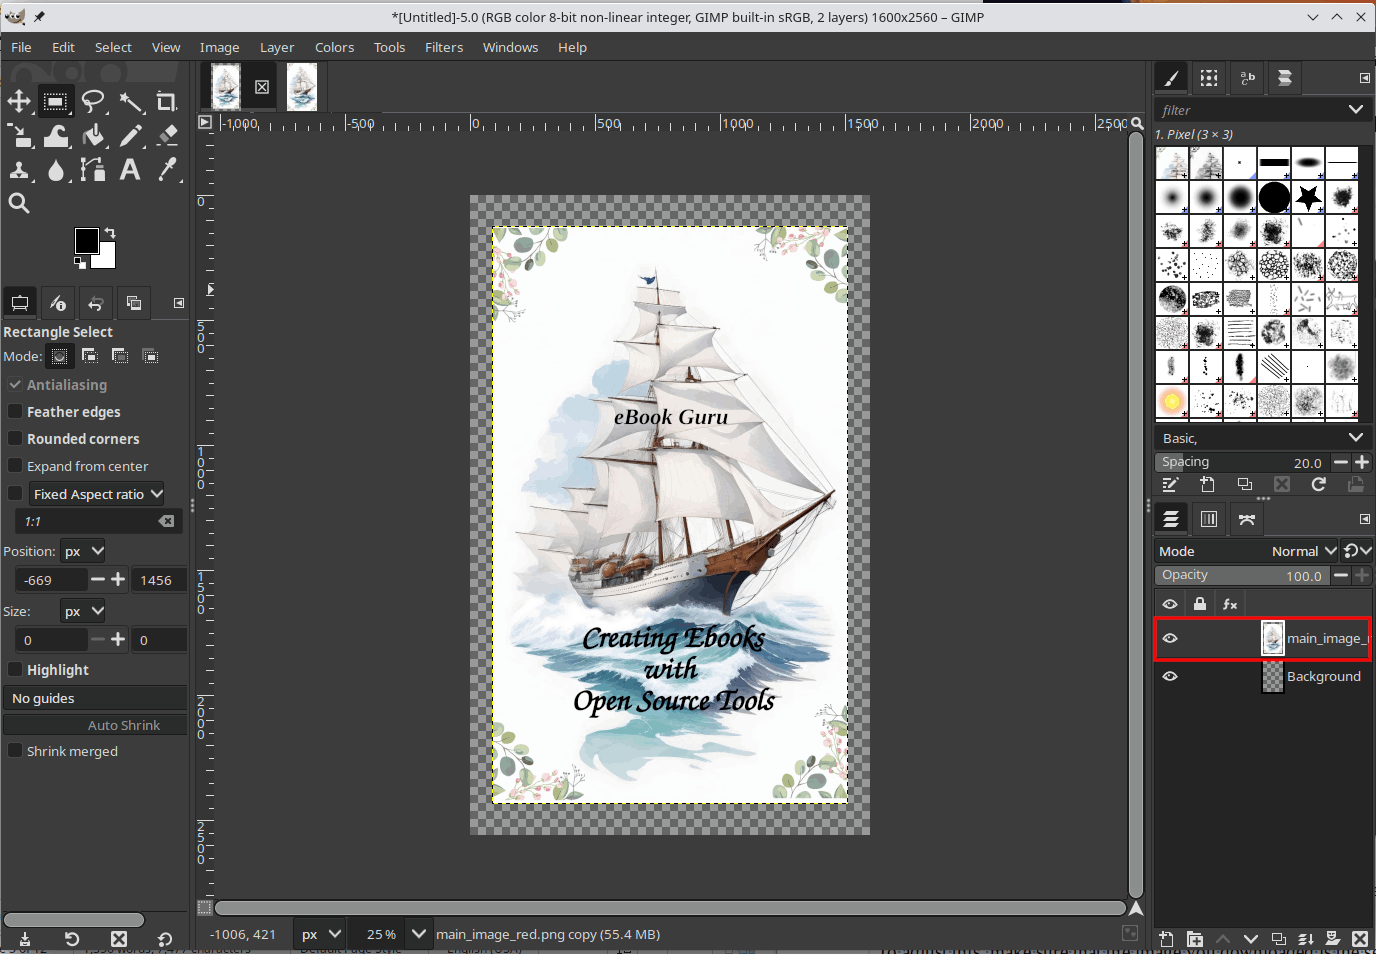
👉🏾 Resize the image to fit the cover template:
💥 Ensure the imported image layer is selected (See image below).
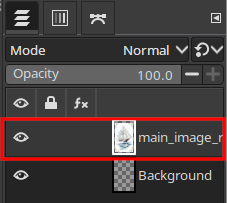
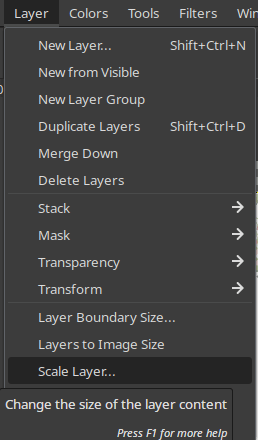
💥 In the toolbar go to Layer > Scale Layer.
💥 In the dialogue box “Scale Layer”, adjust the width and height of the imported image. Make sure neither value is smaller than 1600 (width) or 2560 (height).
💥 By default, height and width are linked to keep the proportions correct. You can unlink them, but this may stretch and distort the image.
👉🏾 Aim for an image that is slightly larger than the template. If it’s smaller, you’ll be left with transparent areas, making the cover ineligible for use.
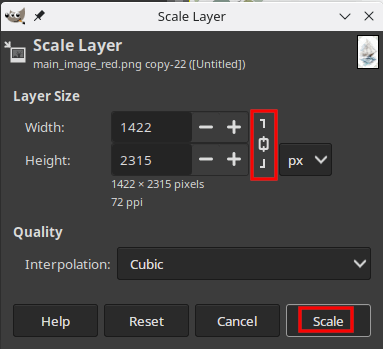
👉🏾 Click Scale to apply the changes.
👉🏾 Click the Save button to store the cover image in a file.
At this stage, you now have the foundation of your eBook cover.
Upload your manuscript in Calibre
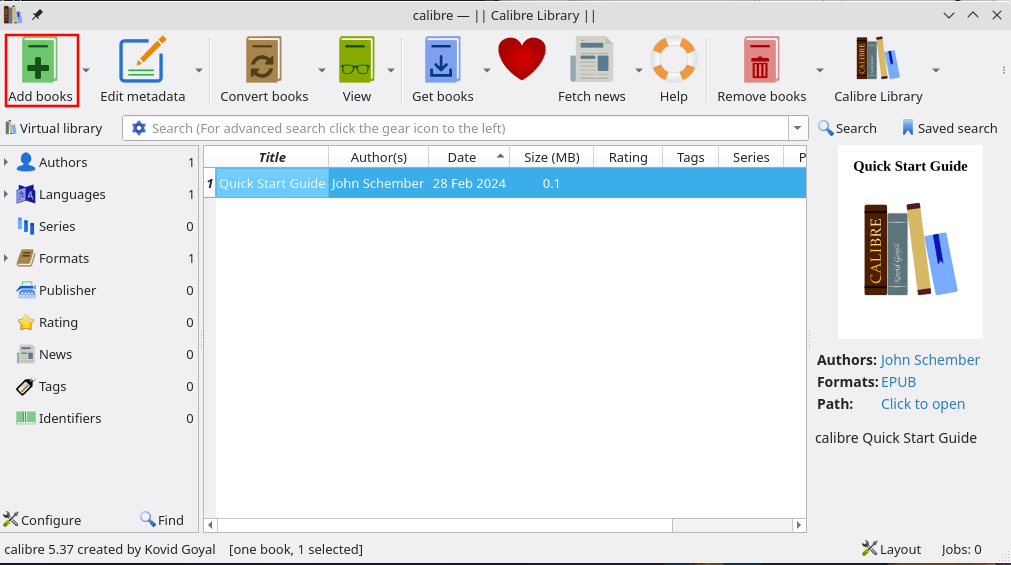
In Calibre, click the “Add books” button. In the dialog box, browse to the location of your .odt file and add it to the library.
Add the metadata
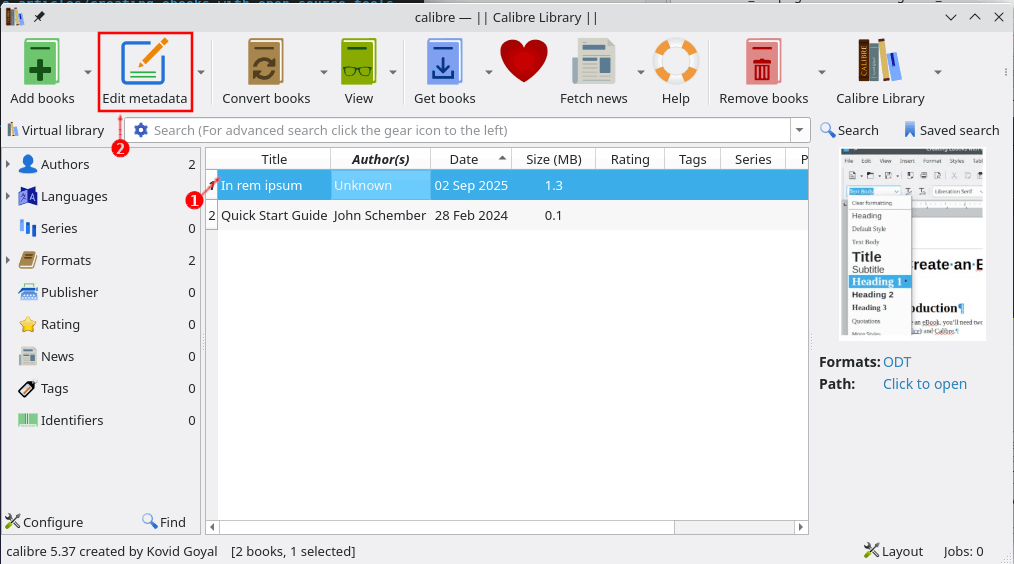
Once the manuscript is in your Calibre library, select it and click the “Edit metadata” button.
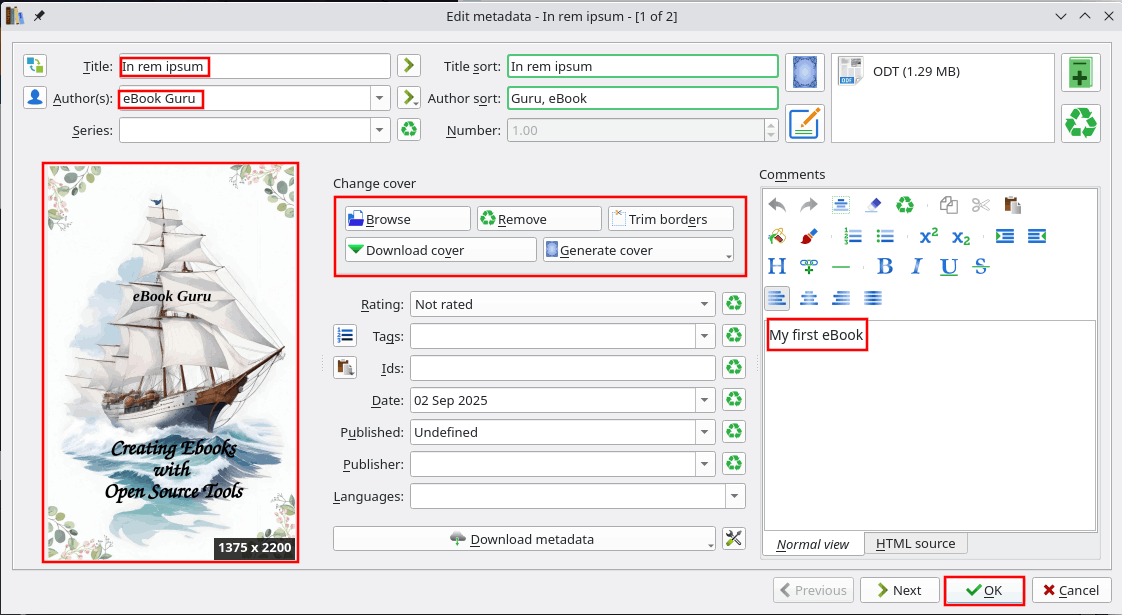
Here you can add key information such as:
💥 Title
💥 Author
💥 Cover image
💥 Description
💥 ...
When done, click OK.
Convert the manuscript to an eBook
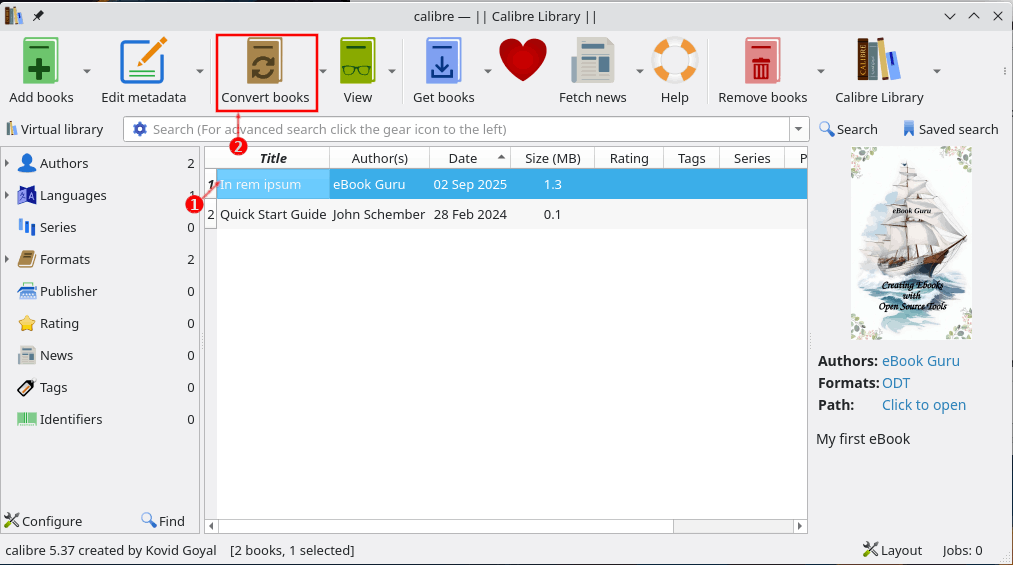
Next, select the file and click the “Convert books” button.
A new window will open with several options, but you only need a few to get started.
👉🏾 Choose the format:
With the Metadata tab selected, go to the top-right corner and select EPUB.
(You can also generate a MOBI file, but in my experience, they don’t always behave consistently.)
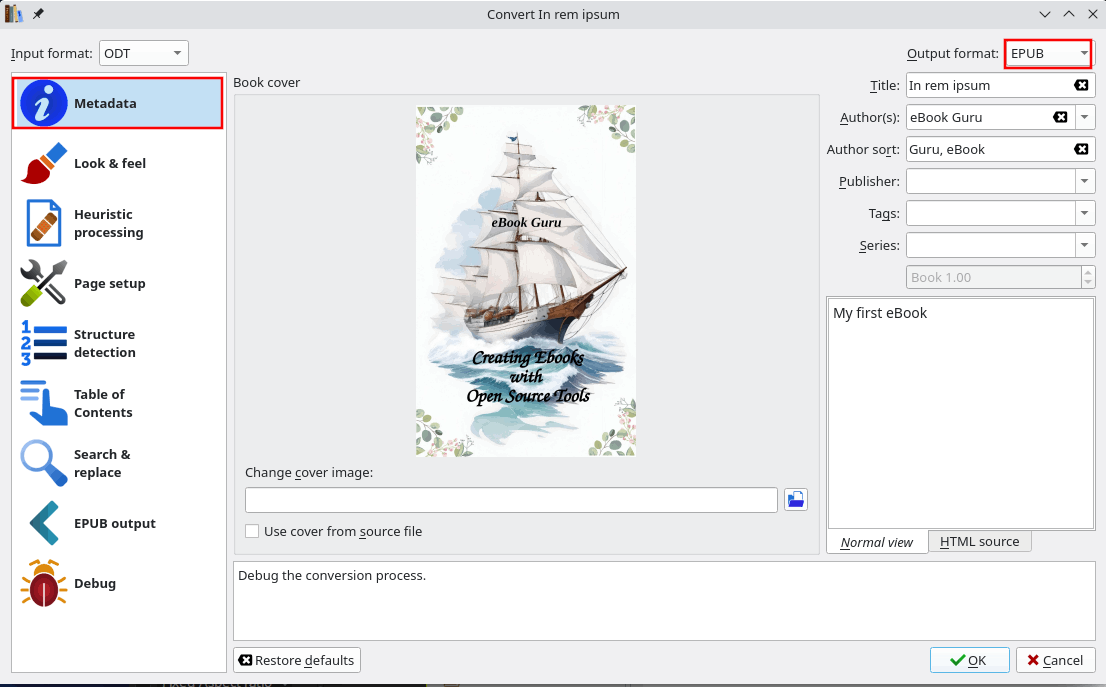
👉🏾 Create a table of contents (optional):
💥 Skip this step, if you don’t plan to use a table of contents in your book.
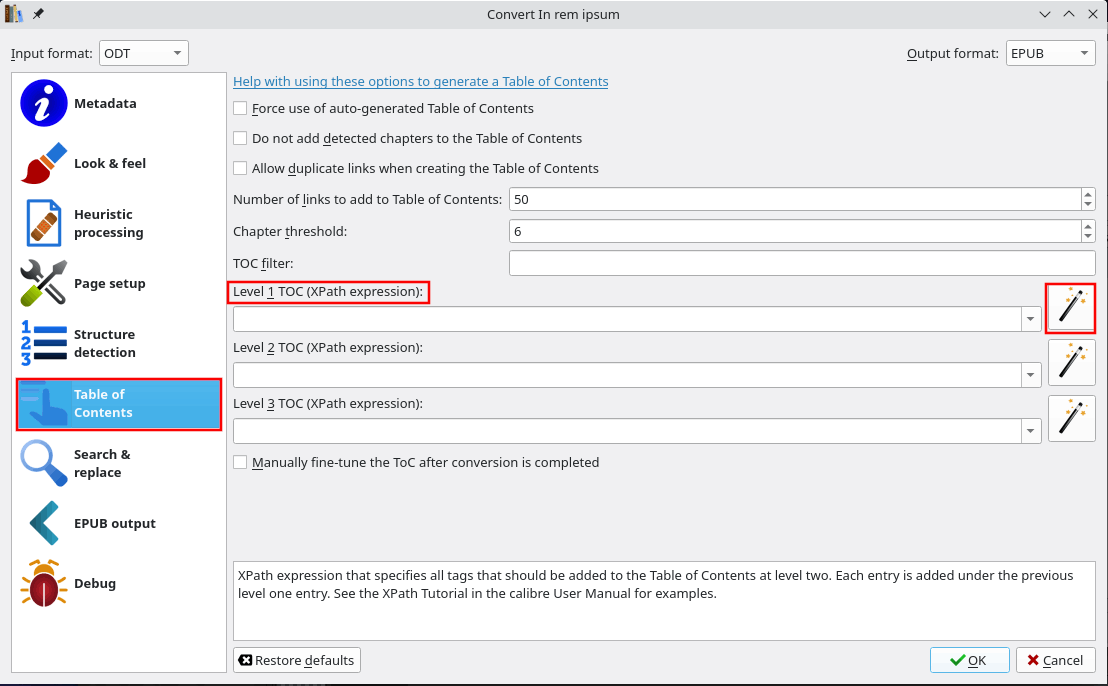
💥 Switch to the Table of Contents tab.
💥 Click the wizard icon next to “Level 1 TOC (XPath expression)”.
💥 In the new window, select h1 from the dropdown under “Match HTML tags with tag name” and click OK to close the window.
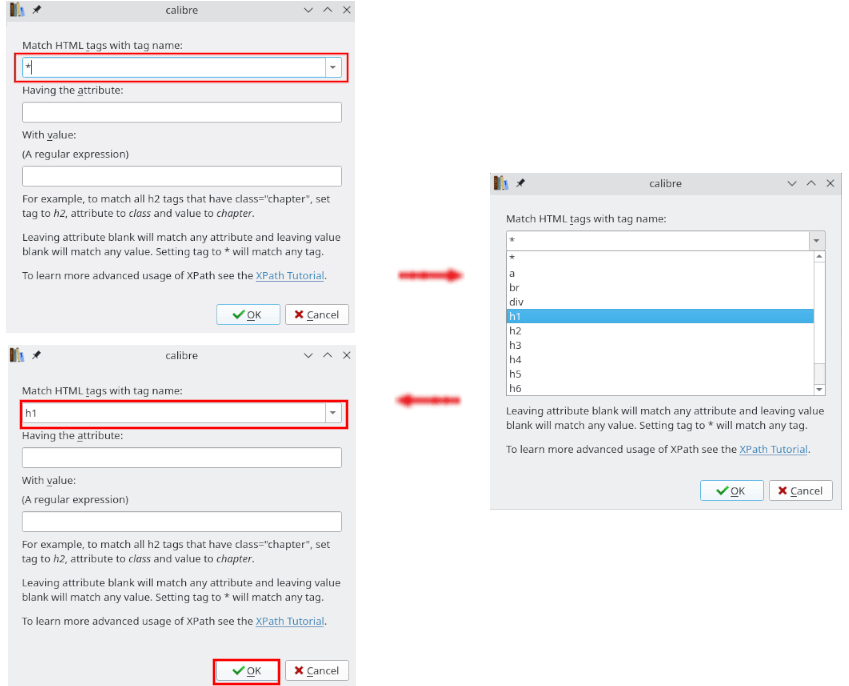
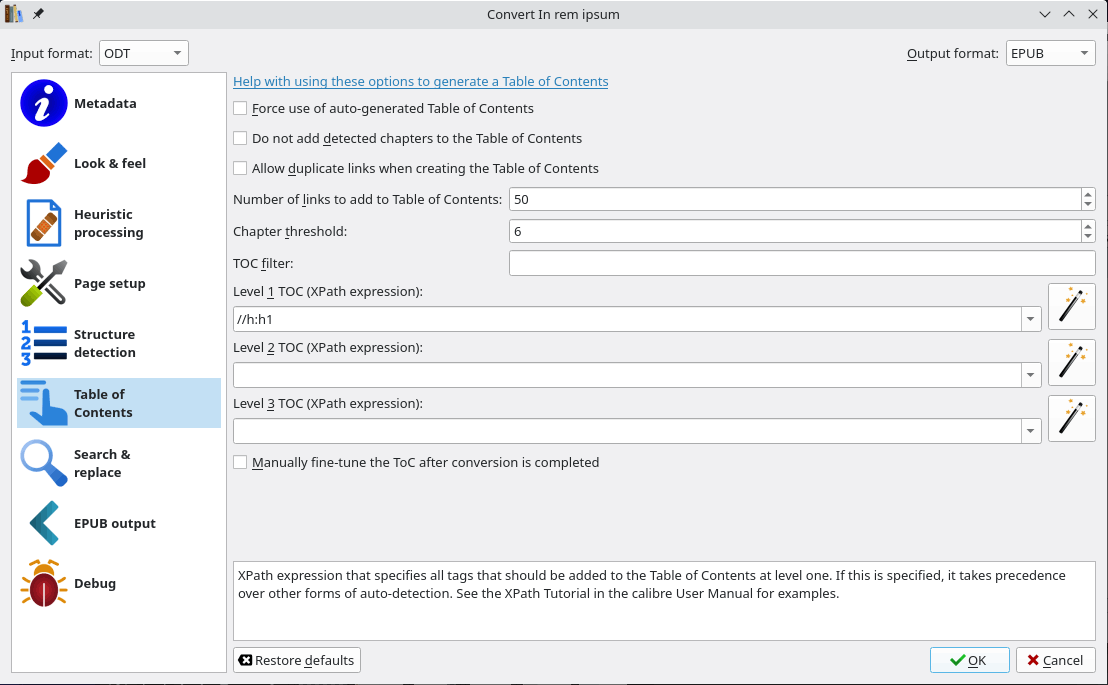
💥 If you created sub-chapters in your manuscript, repeat the process for Level 2 TOC and select h2.
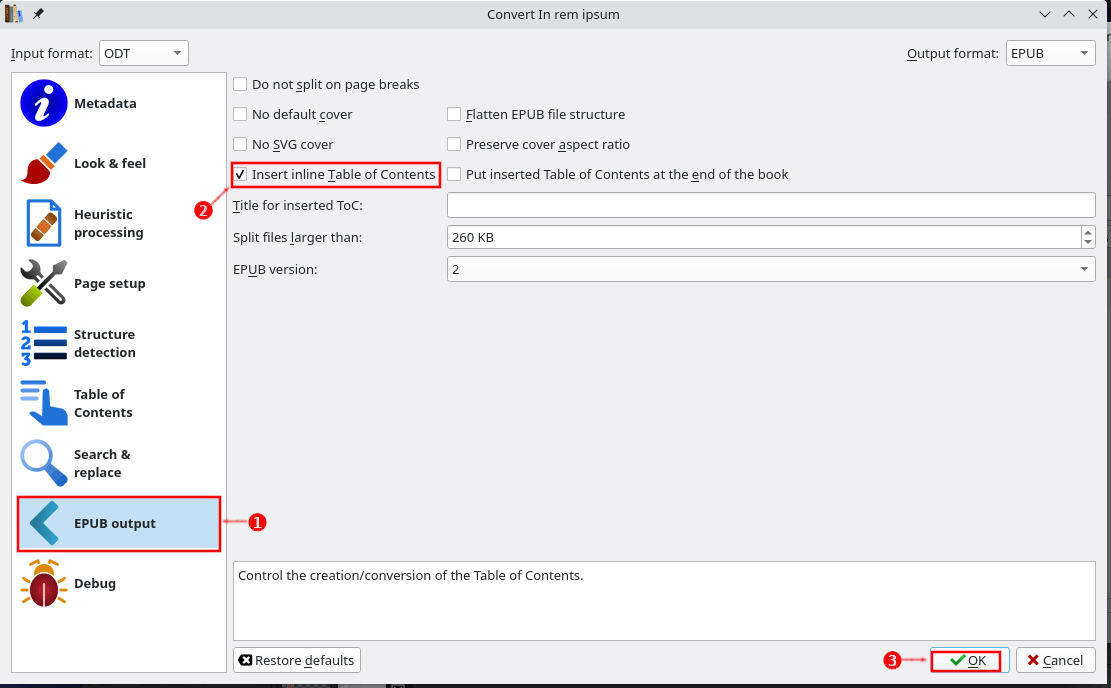
💥 In the EPUB Output tab, check the option “Insert inline Table of Contents”.
👉🏾 Optional CSS styling:
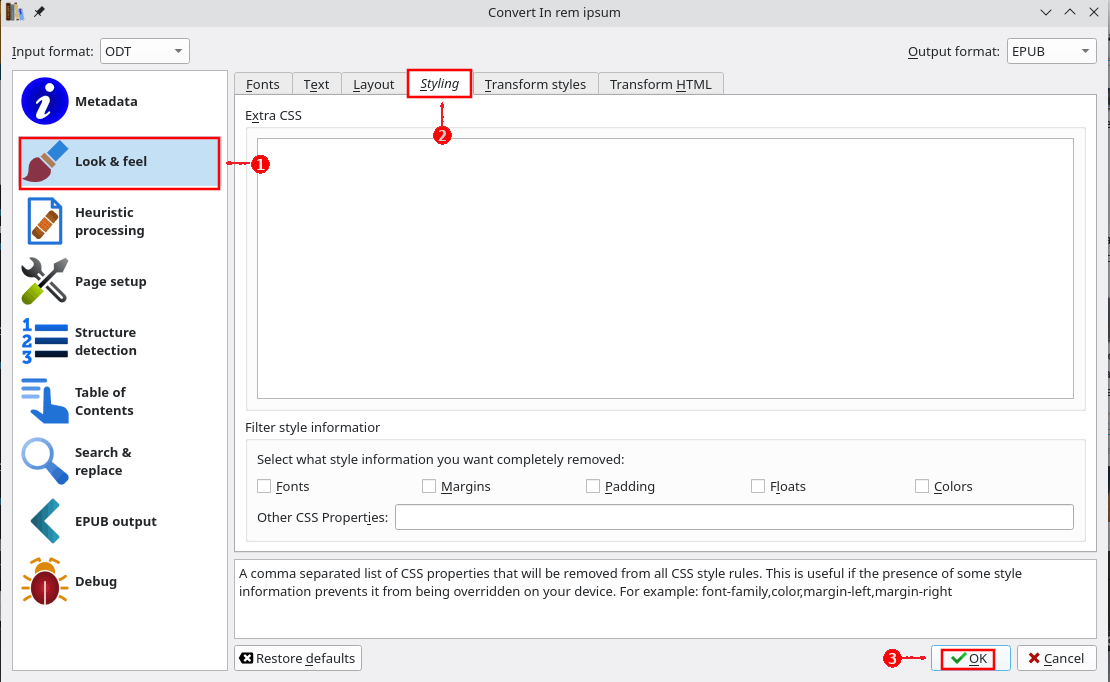
For advanced users: under the Look & Feel section, select the Styling tab and add your CSS code. (Note: The MOBI format does not support all CSS styling.)
Start the conversion
Click the OK button to start it. Unless your file is very large, the conversion will finish quickly.
🎉 Congratulations—you’ve just created your first eBook in Linux! Hopefully, this tutorial inspires you to keep experimenting with open-source tools for self-publishing.
Author
